Introduction to Steps
Steps are the building blocks of workflows. They are the individual units of work that make up a workflow. The concept is simple: steps are connected from left to right in a chain, with each step flowing into the next. When steps are connected, the output of one step automatically becomes available as input for the next step in the chain. This creates a seamless flow of data throughout your workflow, where information is passed along from one step to the next. We’ll cover the specific syntax for accessing step outputs in the coming sections.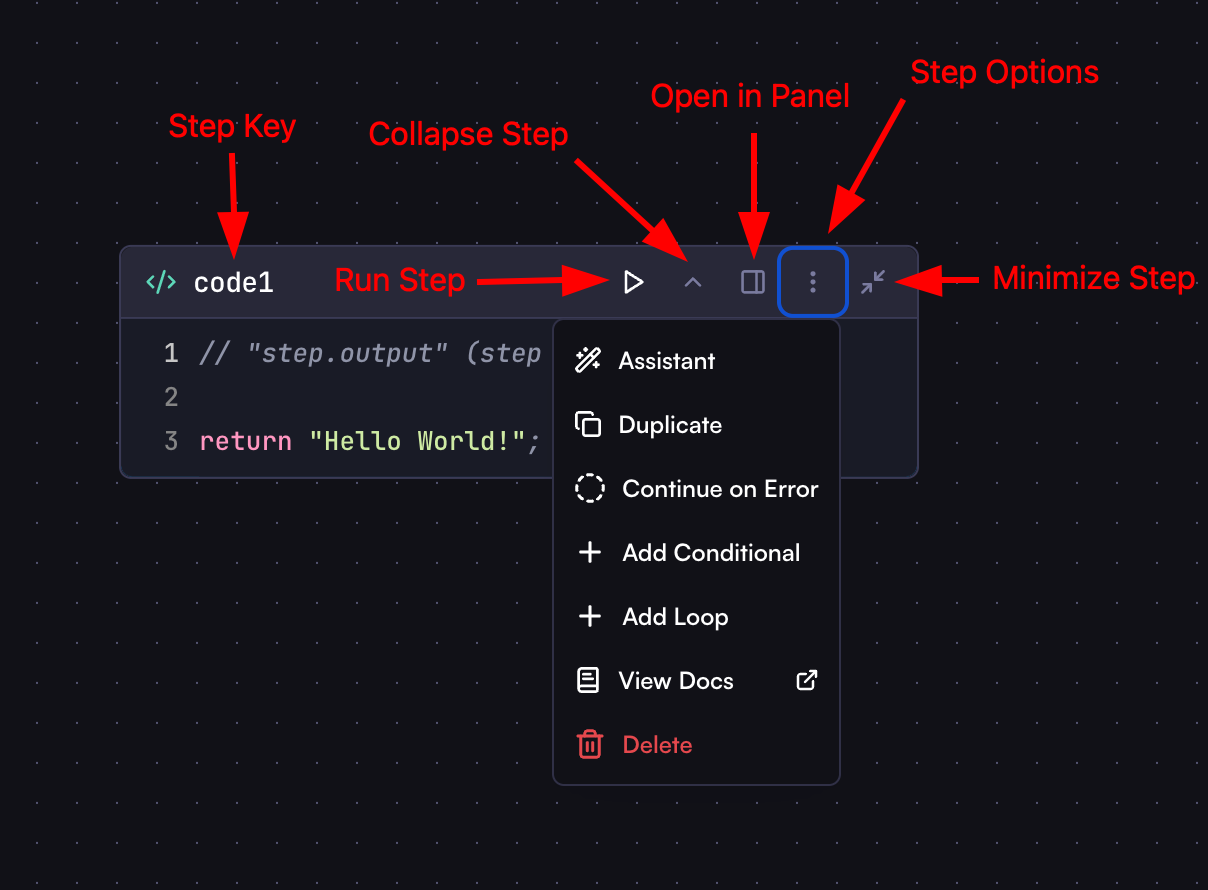
- Step Key: Identifier used to reference the step when accessing its output. Click to rename it.
- Collapse Step: Collapses the step body while keeping output visible if available.
- Run Step: Executes only this specific step to quickly view its output without running the entire workflow.
- Open in Panel: Opens the step in a separate panel for focused editing.
- Step Options: Provides additional configuration options:
- Assistant: Opens the step in assistant mode for direct editing with AI assistance
- Duplicate: Creates a copy of the step
- Continue on Error: Allows workflow to continue even if this step fails (output won’t be available)
- Add Conditional: Creates conditional logic (detailed in later sections)
- Add Loop: Adds iteration capability (detailed in later sections)
- Delete: Removes the step
- Minimize Step: Collapses the step to show only its type with a large label, maintaining workflow readability while still allowing panel access for editing.
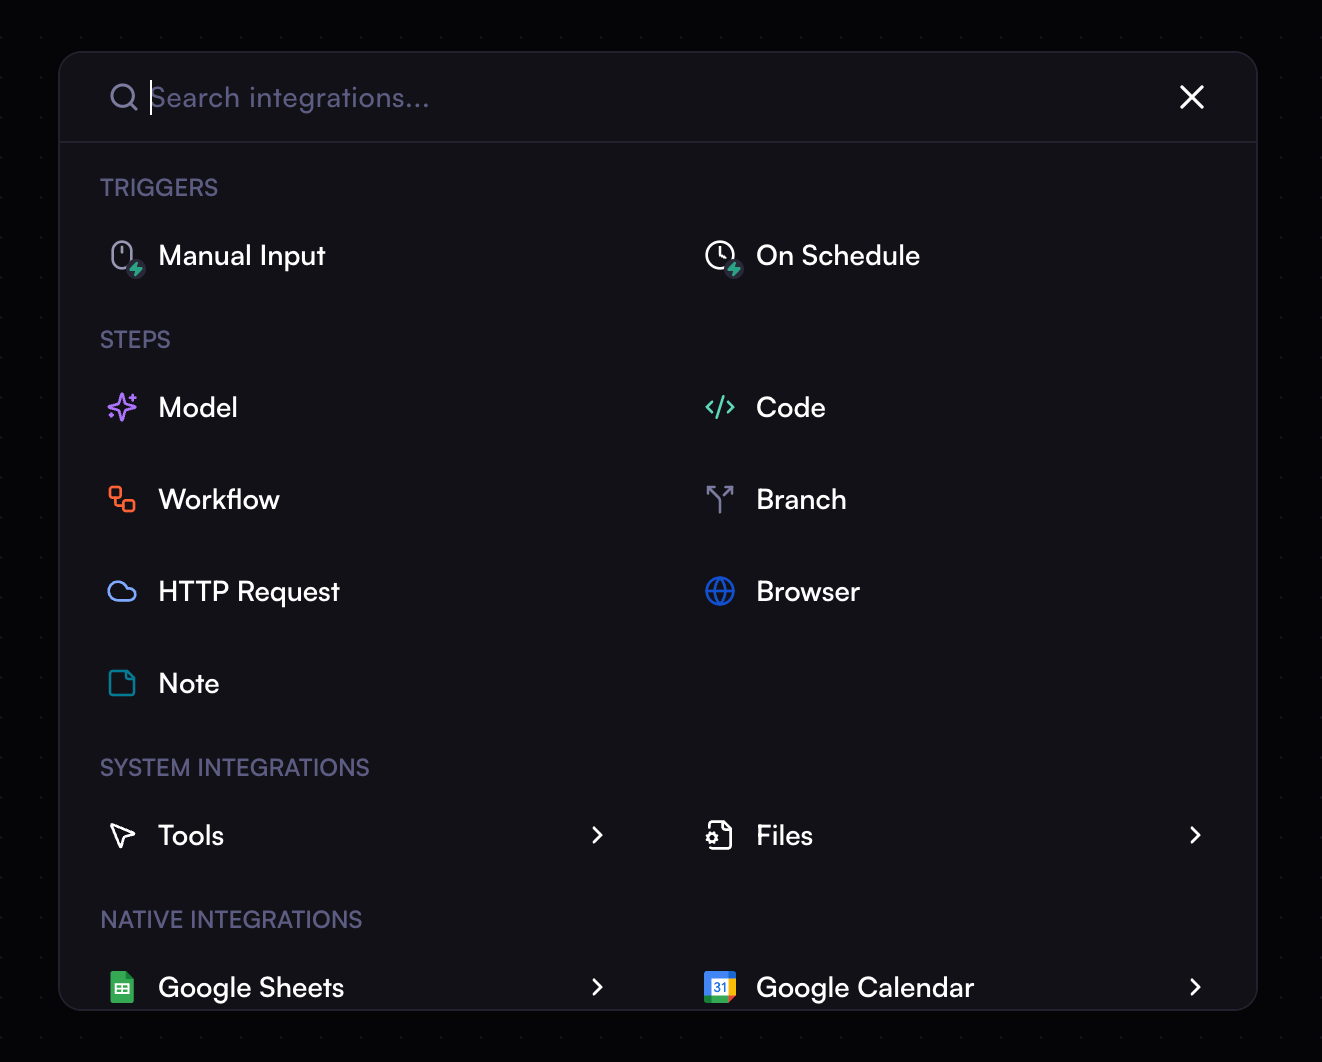
Step Types
Cortex offers a variety of step types, each with its own unique properties and capabilities:- Processing steps: Input, Model (AI), Code, HTTP Request, Browser
- Action steps: Send Slack message, send email, create a new row in a spreadsheet, add content to a Notion page, and more
- Trigger steps: On receiving an email, on new event in Google Calendar, on new Slack message, and more
- File steps: Upload a file, download a file, convert markdown to PDF, convert HTML to PDF, extract pages from PDF, extract contents from PDF, and more
- Tool steps: Perform a Google search, Maps search, YouTube search, and more
Steps connected to a trigger step are executed when the trigger event occurs.
These connected steps receive the corresponding data from the trigger step.
Step Outputs
The output of a step is the data that the step produces. This output can be used in any steps connected to that step.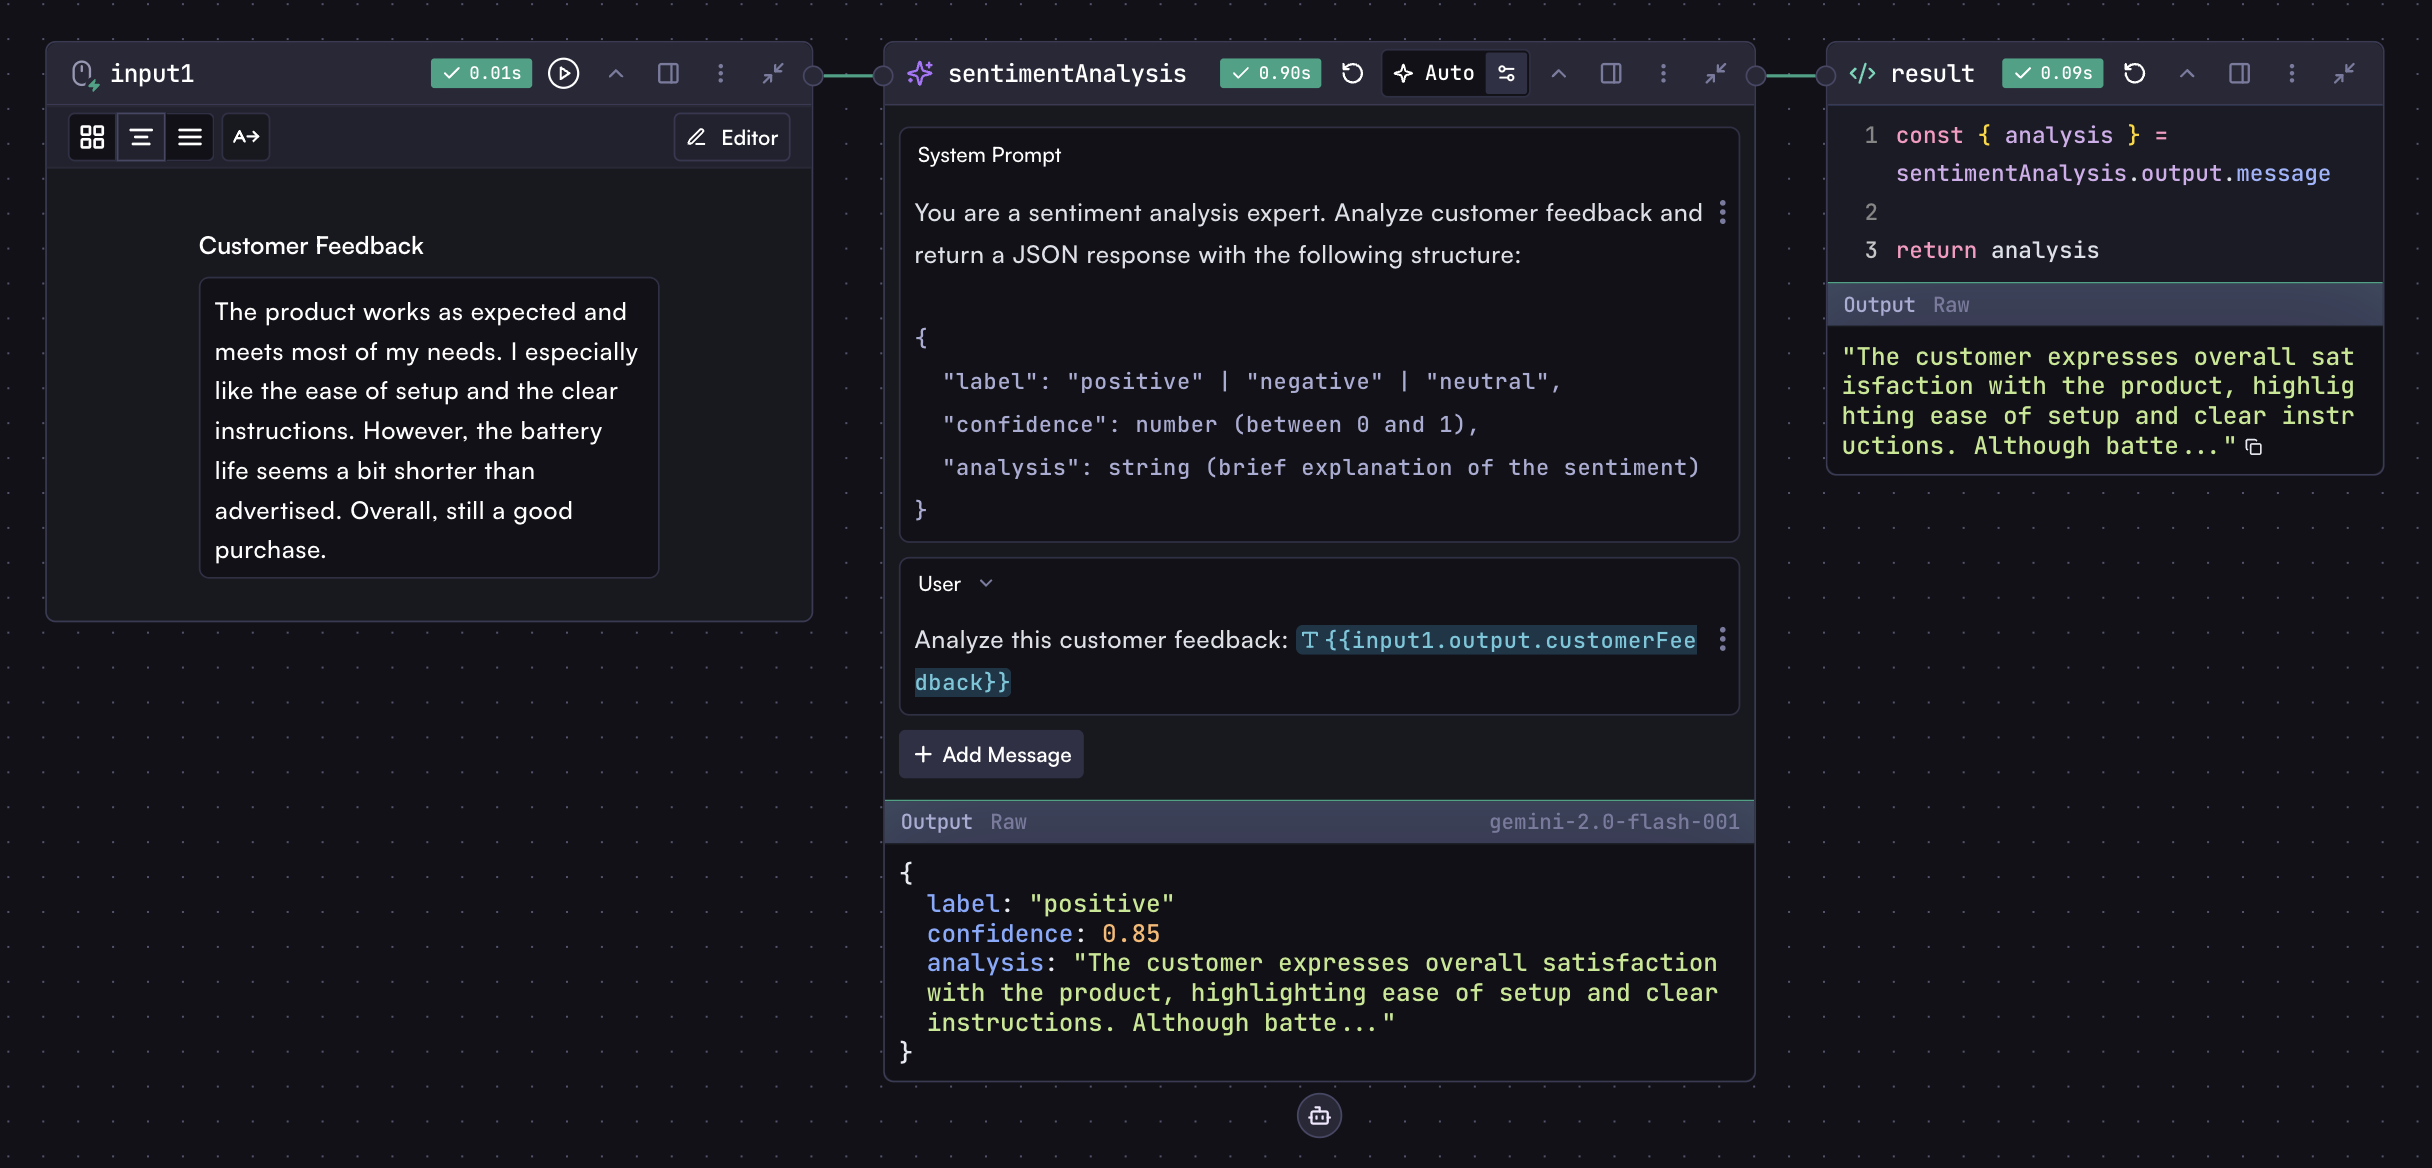
Variables
Variables allow you to access a step’s output in other steps. Step outputs can be of different types: objects, arrays, strings, numbers, booleans, etc. Most steps produce object outputs, like the Model step, HTTP Request step, Browser step, trigger steps, and action steps. For Code steps, the output is whatever you return from the code. To access step outputs in your workflow, use this syntax:stepKey is the key of the step, and output refers to the step’s output.
Use this syntax in any step’s input fields (except Code steps). For example, you can use it in Model step prompts, Browser step URLs, HTTP Request step URLs, bodies, headers, and more. Wherever you use this syntax, it will be replaced with the step’s output.
Variables are replaced as is. Objects and arrays are automatically stringified when used in text contexts like model prompts (e.g.,
{{userDataStep.output}} becomes a JSON string).{{}} syntax:

raw tab in the step’s output section. This helps you understand what the step outputs and how to use it.
Another example: the response body of an HTTP request step is available in the body property:
status property:
Step Output Inspection
To understand what’s available, inspect the step output in the raw tab, and you’ll see what you can use.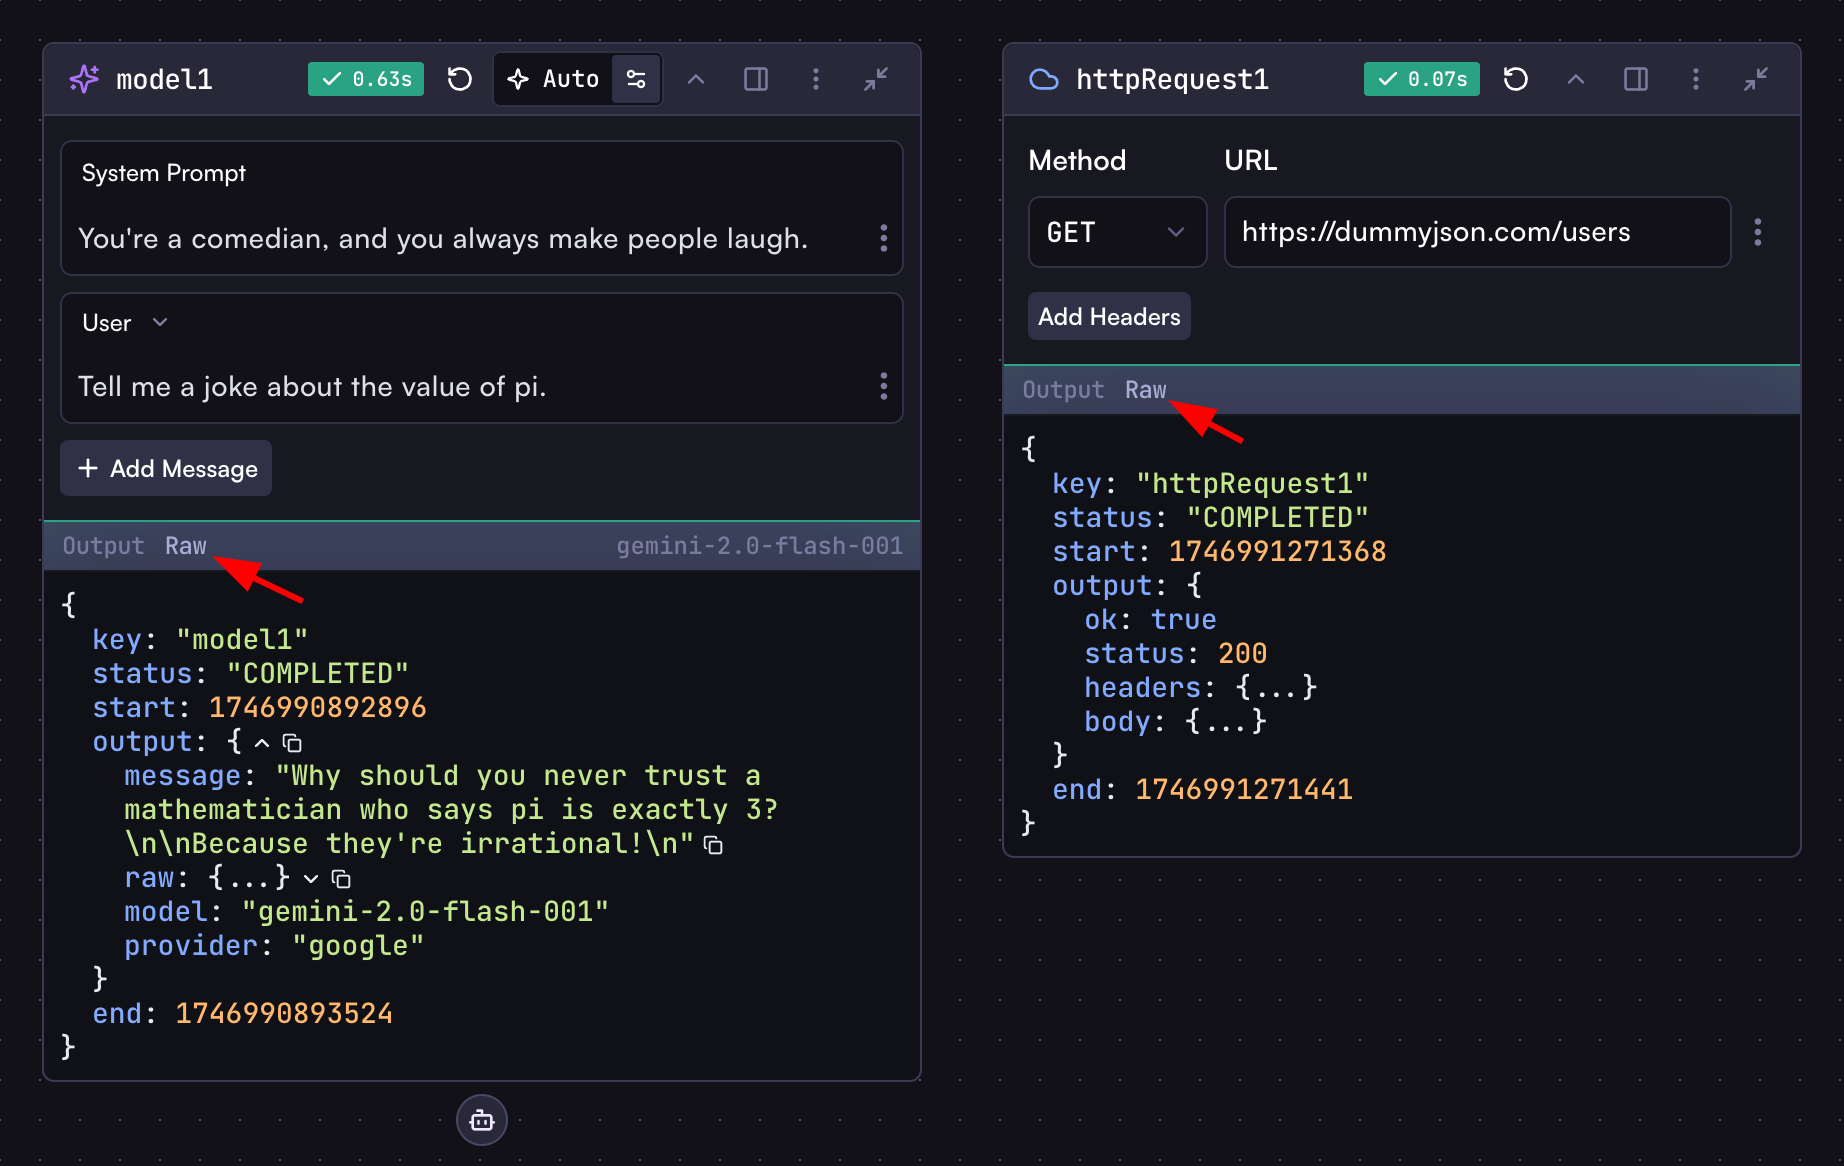
Remember: use the
{{}} syntax to access step outputs in non-code steps, and use variables directly in Code steps without this syntax.
Next Steps
Now that you understand the basics of steps, let’s dive into the different types of steps and how to use them.Input Step
Create interactive forms and collect user input in your workflows
Processing Steps
Transform data with AI models, code execution, and HTTP requests
Trigger and Action Steps
Automate workflows with event triggers and interact with external services
Agents
Autonomous AI agents that can reason, plan, and interact with various tools to
complete complex tasks.