Using the Result Property
Theresult property plays a central role in API interactions. In your workflow’s final code step, any data you return in the result property becomes the main output received when calling the workflow via API:
result object will be directly accessible in the API response.
Rules for the Result Property
There are some key rules to remember about how theresult property works:
- If the last code step returns a object with a
resultproperty, it becomes the API response - If no
resultproperty exists, the entire output of the last step becomes the API response - Earlier steps results are overridden by the last code step
Getting Your API Key and Workflow ID
Before you can run workflows via API, you’ll need two things:1. Create an API Key
To create an API key:- Go to the API Keys page
- Click “New API Key”
- Enter a name for the key
- Copy the key (it will only be shown once)
2. Find Your Workflow ID
To copy your workflow ID:Running a Workflow via API
Let’s take the fields extraction workflow that you built in the Your First Workflow tutorial as an example. Now we’ll see how to run it via API to pass dynamic files and extract fields programmatically, making the extracted data available in your application.Preparing Your Workflow for API Access
To make your workflow API-ready, you’ll need to add a code step that returns the extracted data: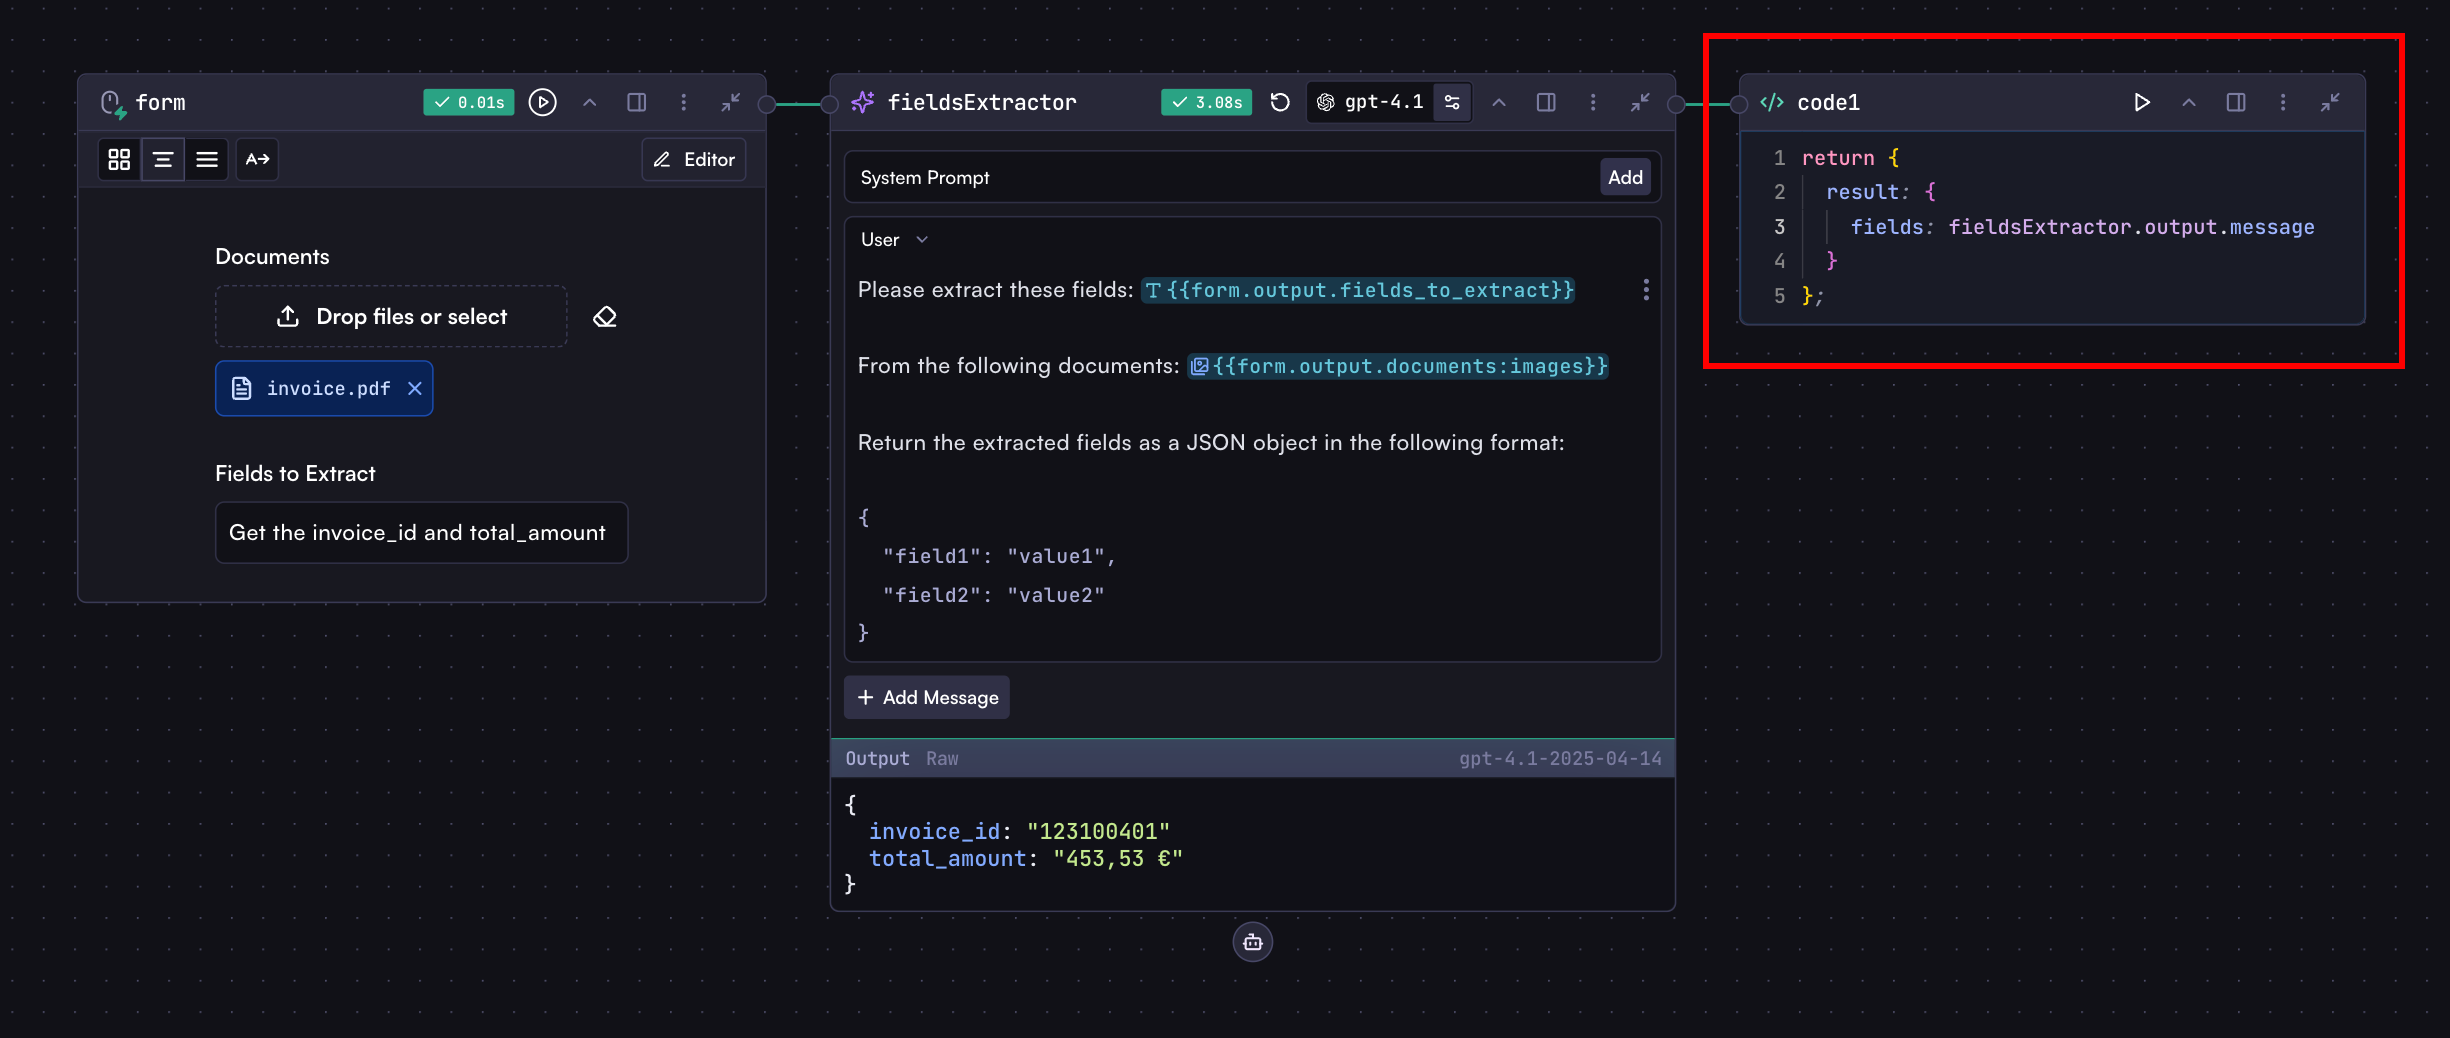
result property that has a fields property containing the extracted data.
Now, let’s deploy the workflow and run it via API. Before you can access your workflow through the API, you need to deploy it first:
- Follow the instructions in the Deploy section to publish your workflow
- Once deployed, you can run it via API
Run It
You can run a workflow using either the REST API with a direct HTTP call or using one of our SDKs.Response Structure
The API response contains various information about the run, including:result, which contains the direct output from your workflow’s final code step.
Understanding the Input Object
Theinput object you provide when running a workflow corresponds to the fields you’ve defined in your workflow’s input steps. The structure is based on the field you defined in the input step:
For example, if your input step has fields like:
Your API input would look like:
More Options
Beyond the basicinput object, several additional parameters enable more granular control:
Workflow Version Control
When running workflows via API, you can specify which version of the workflow to use.Starting from a Specific Step
If your workflow has multiple entry points (multiple input steps), you can specify which one to start from:Background Processing
For long-running workflows, you can execute them in the background:Error Handling
When running workflows, various errors can occur:Run Workflow API Reference
Detailed API documentation including all available parameters and response
fields