Field Types
Input steps support the following field types:- Text - Single-line or multi-line text input
- Number - Numeric input that only accepts numbers
- Checkbox - Boolean input (checked or unchecked)
- Date - Calendar date picker
- Time - Time selection picker
- Options - Dropdown or radio button selection from predefined options
- File - File upload field
- Date Time - Combined date and time picker
- Group - Container for organizing related fields, can be nested
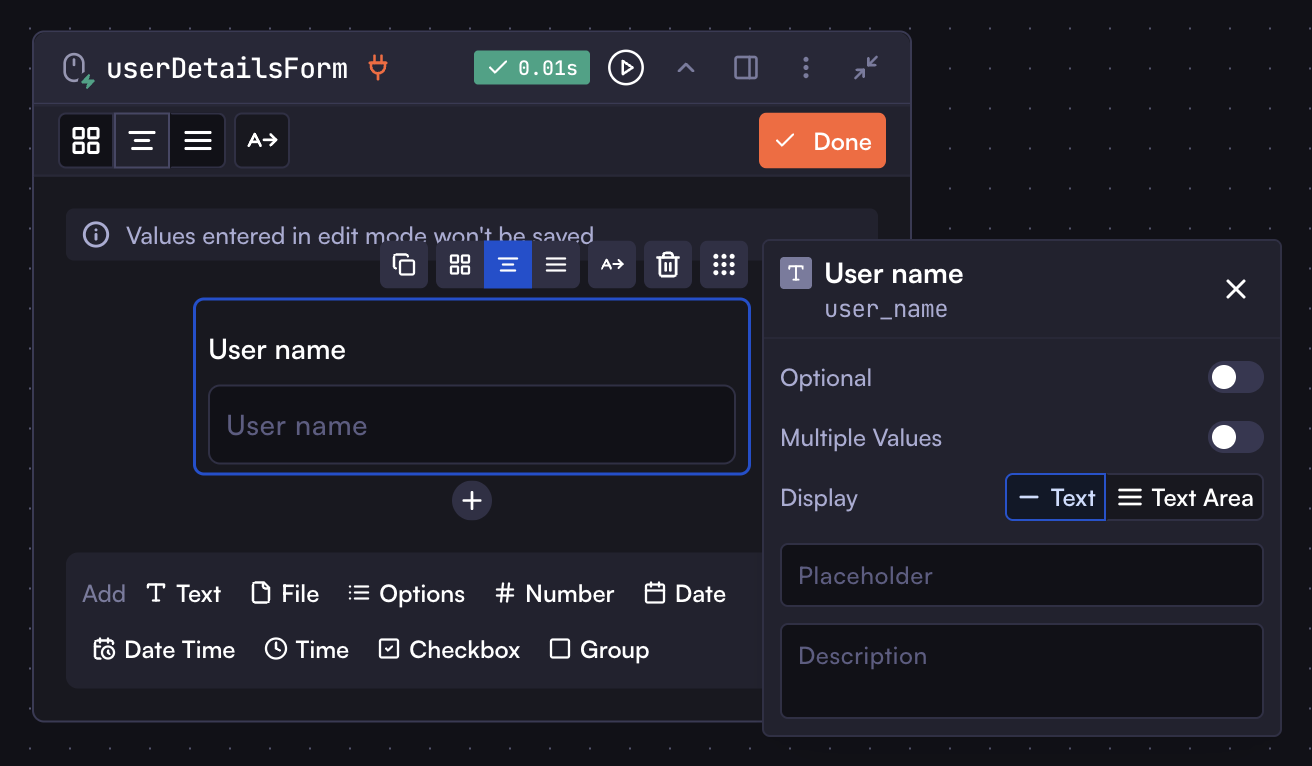
Adding a Field
To add a field to an input step:- Click the “Editor” button in the input step toolbar if you’ve already added a field
- For your first field, click the plus button in the center of the input step
- Use the WYSIWYG editor to select a field type from the bottom toolbar
- Provide a label and key for referencing the field in subsequent steps
- Click “Done” to save your changes
- Add as many fields as needed to complete your form
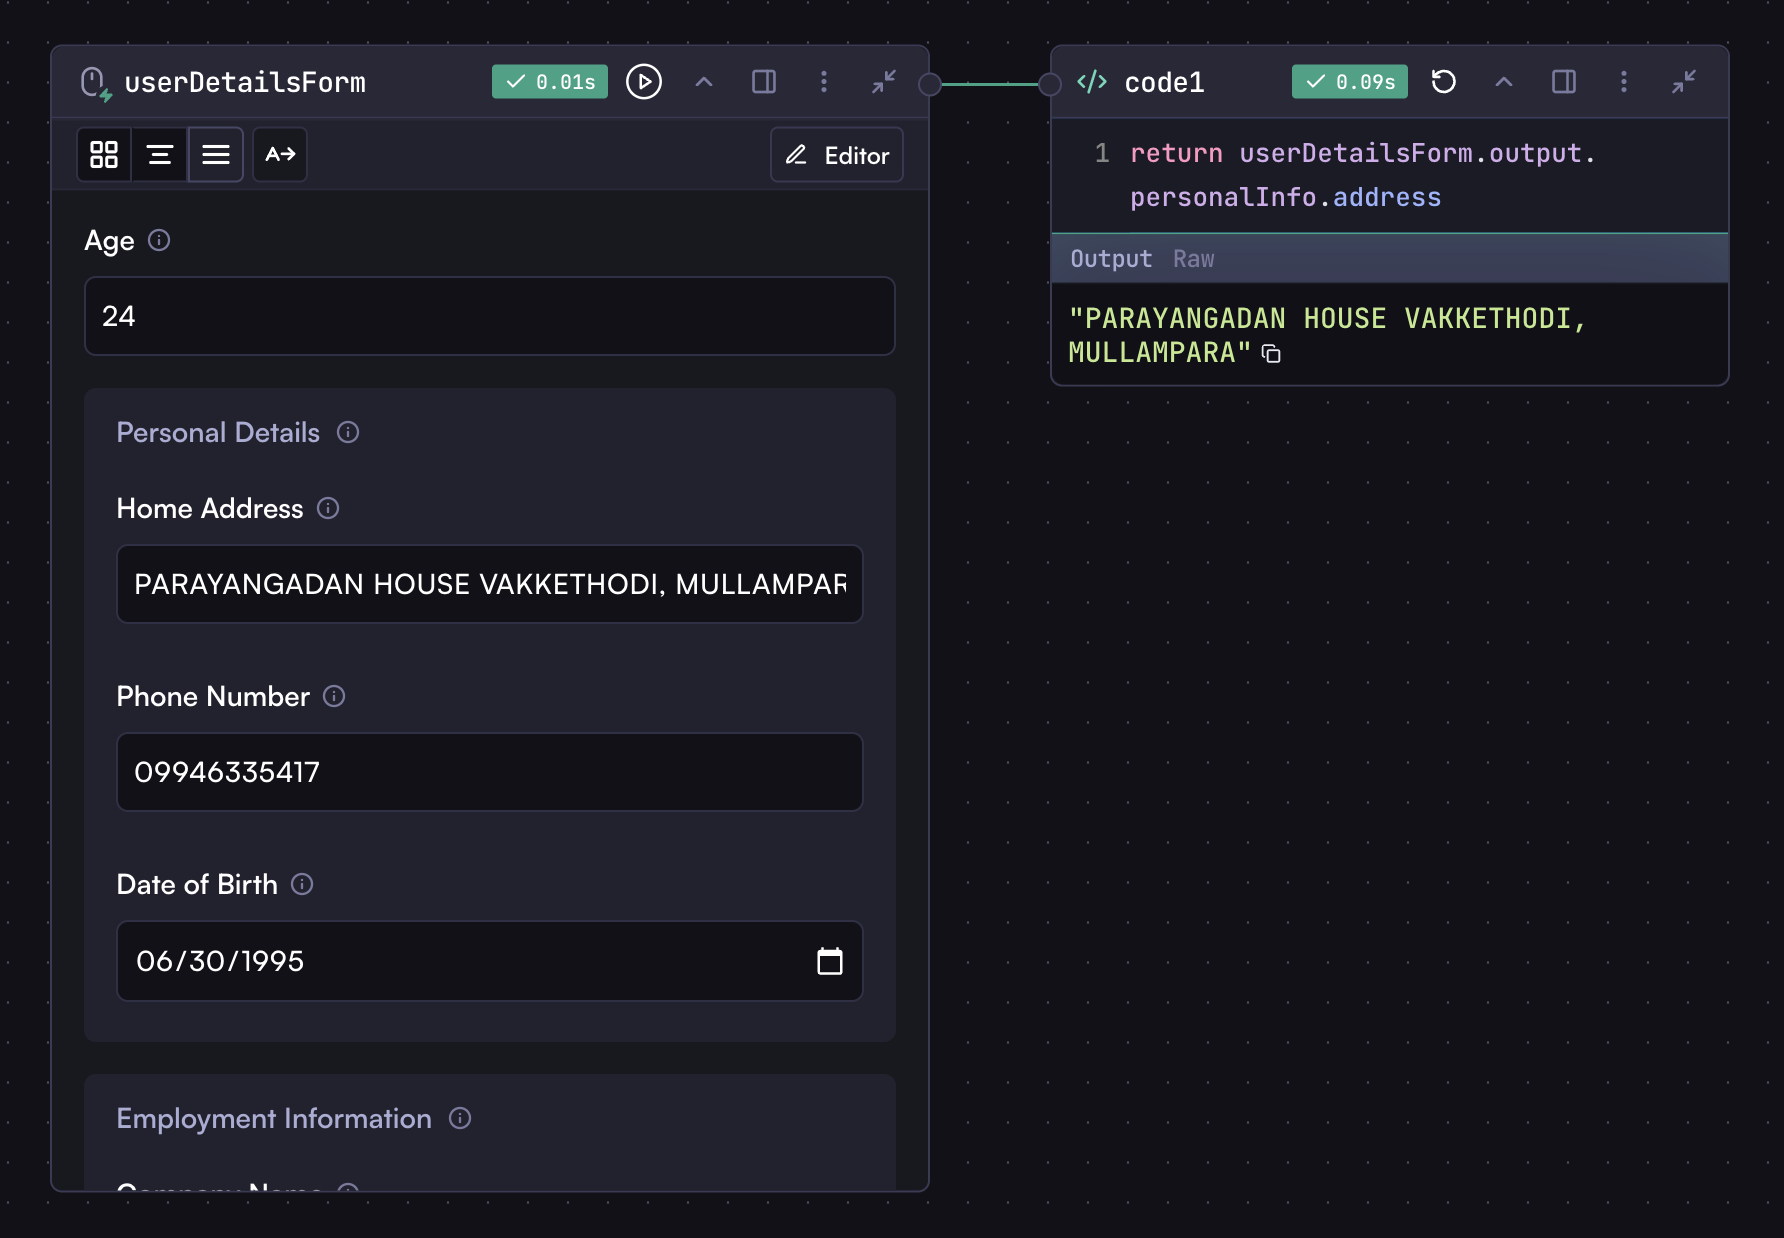
Using Input Values
You can reference input values in connected steps using the following syntax:inputStep is the input step’s key and fieldKey is the field’s key. For fields with multiple values enabled, the value will be an array.
For group fields, access nested fields using dot notation:
Field Settings
Common settings available for all fields include:- Optional - Makes the field non-required
- Description - Helpful text that appears when hovering over the info icon
- Multiple Values/Selection - Enables collection of multiple values (where applicable)
File Field
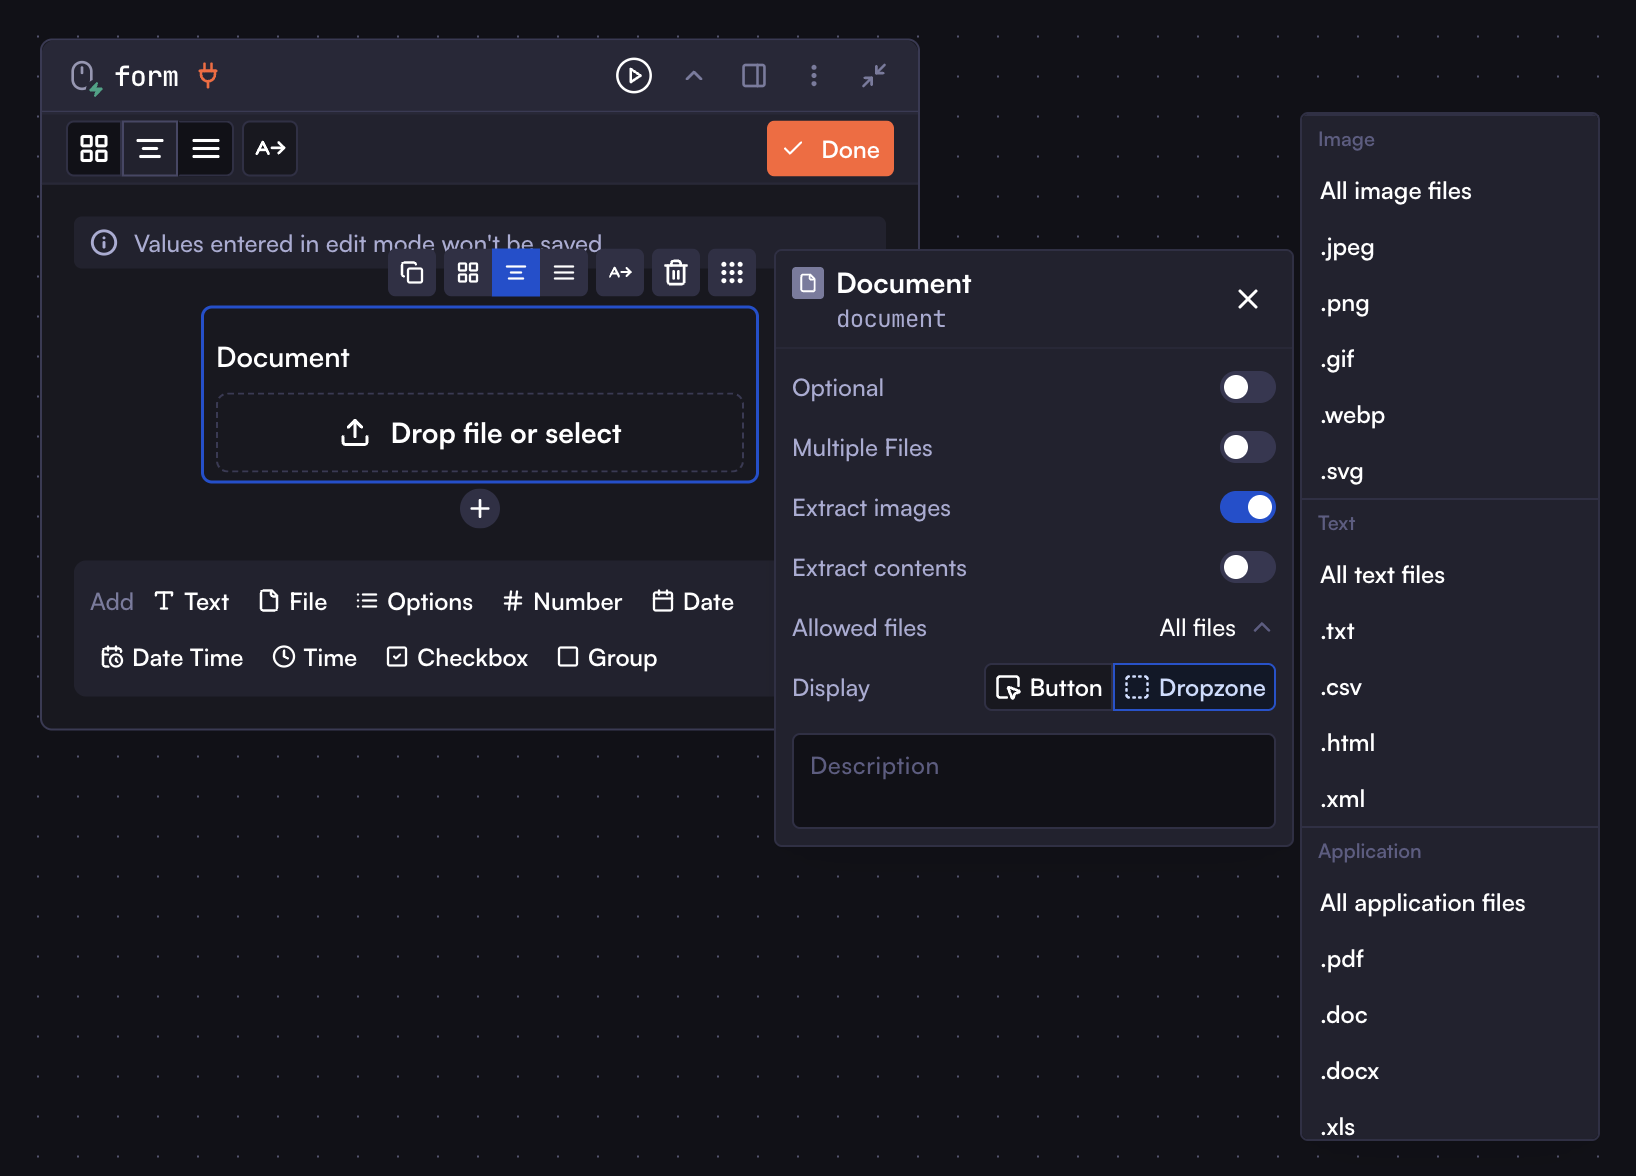
- Multiple Files - Enables multiple file uploads, returning an array of files
- Extract images - Automatically extracts images from documents, accessible with the
:imagessuffix - Extract contents - Extracts text from documents, accessible with the
:contentsuffix - Allowed files - Controls permitted file types:
- All files
- Image files (.jpg, .png, .gif, .webp, .svg)
- Text files (.txt, .csv, .html, .xml)
- Application files (.pdf, .doc, .docx, .xls, etc.)
Accessing Files
Access uploaded files in subsequent steps using:Using Files in Model Steps
Use special suffixes in model prompts with the{{}} syntax:
:images- Passes extracted images to the LLM (requires “Extract Images” enabled):content- Passes extracted text to the LLM (requires “Extract Contents” enabled):file- Passes raw files directly (primarily for Google models handling video/audio)
:file suffix works primarily with Google models that support video or audio input.
That’s all about the input step. The rest is up to you to explore other fields and use them in your workflows. You now have a good understanding of inputs and how to use them, so you can easily add, configure, and use input fields in your workflows.