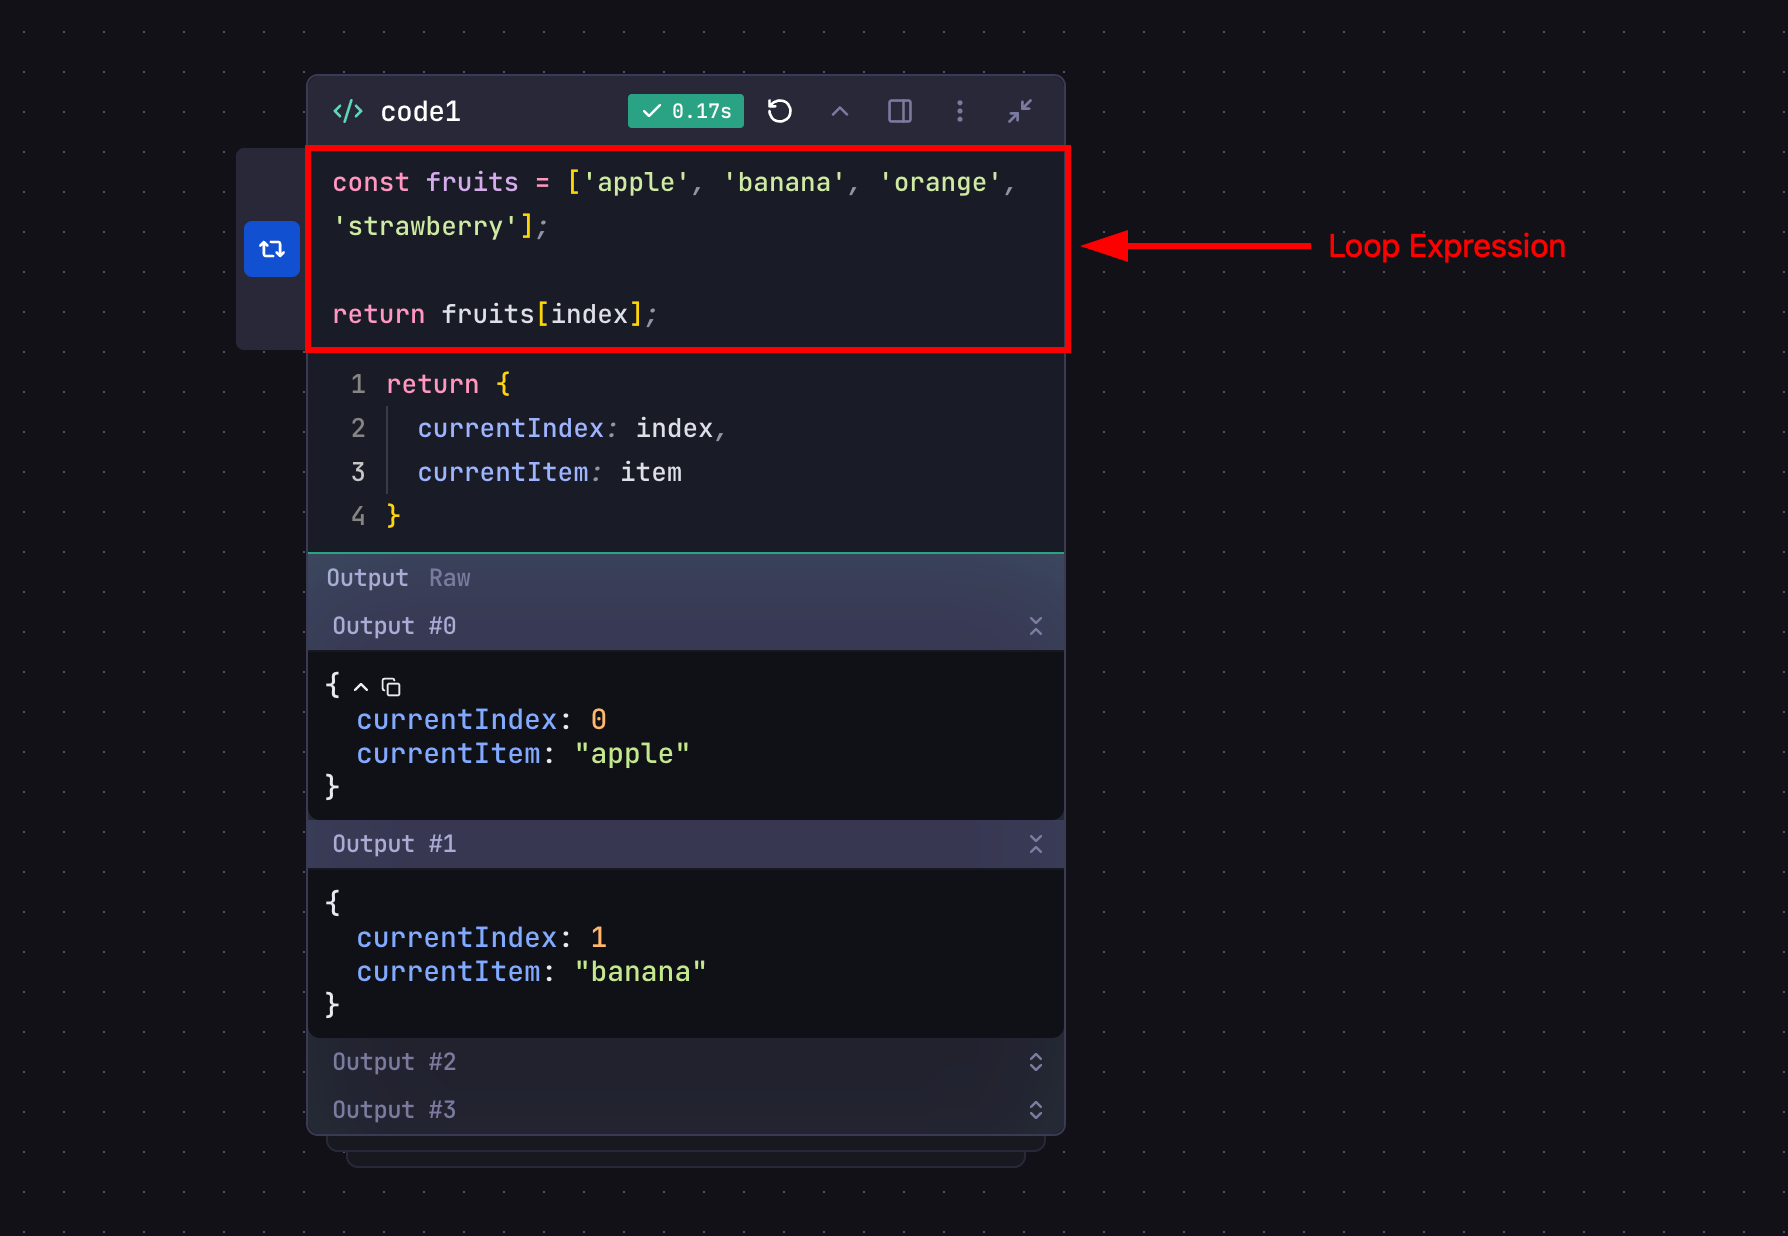
Enabling Loop
To enable looping for a step:- Click the step’s options menu (⋮)
- Click
Add Loop - Enter a loop expression that determines how the step iterates
Loop Expression
- A JavaScript expression that returns the next item to process
- Returns
null,undefined, orfalseto terminate the loop - Has access to special variables:
index: Current iteration number (starts at 0)item: Current value being processed
Loop Output
- When loop is enabled, the step’s output becomes an array
- Each array element contains the output from one iteration
- Output array maintains the order of processing
Loop Expression Rules
- Return one item at a time from the array:
return items[index]; - Never return the full array (causes infinite loop)
Accessing Output
When a step has looping enabled, its output becomes an array containing results from each iteration:map() to access individual iteration results.
Loop Termination
Loop stops when the expression returnsnull, undefined, or false.
Array bounds automatically handle termination:
Examples
Here are some practical examples demonstrating how to use loops in your workflows:Parallel API Requests
Process multiple API endpoints simultaneously: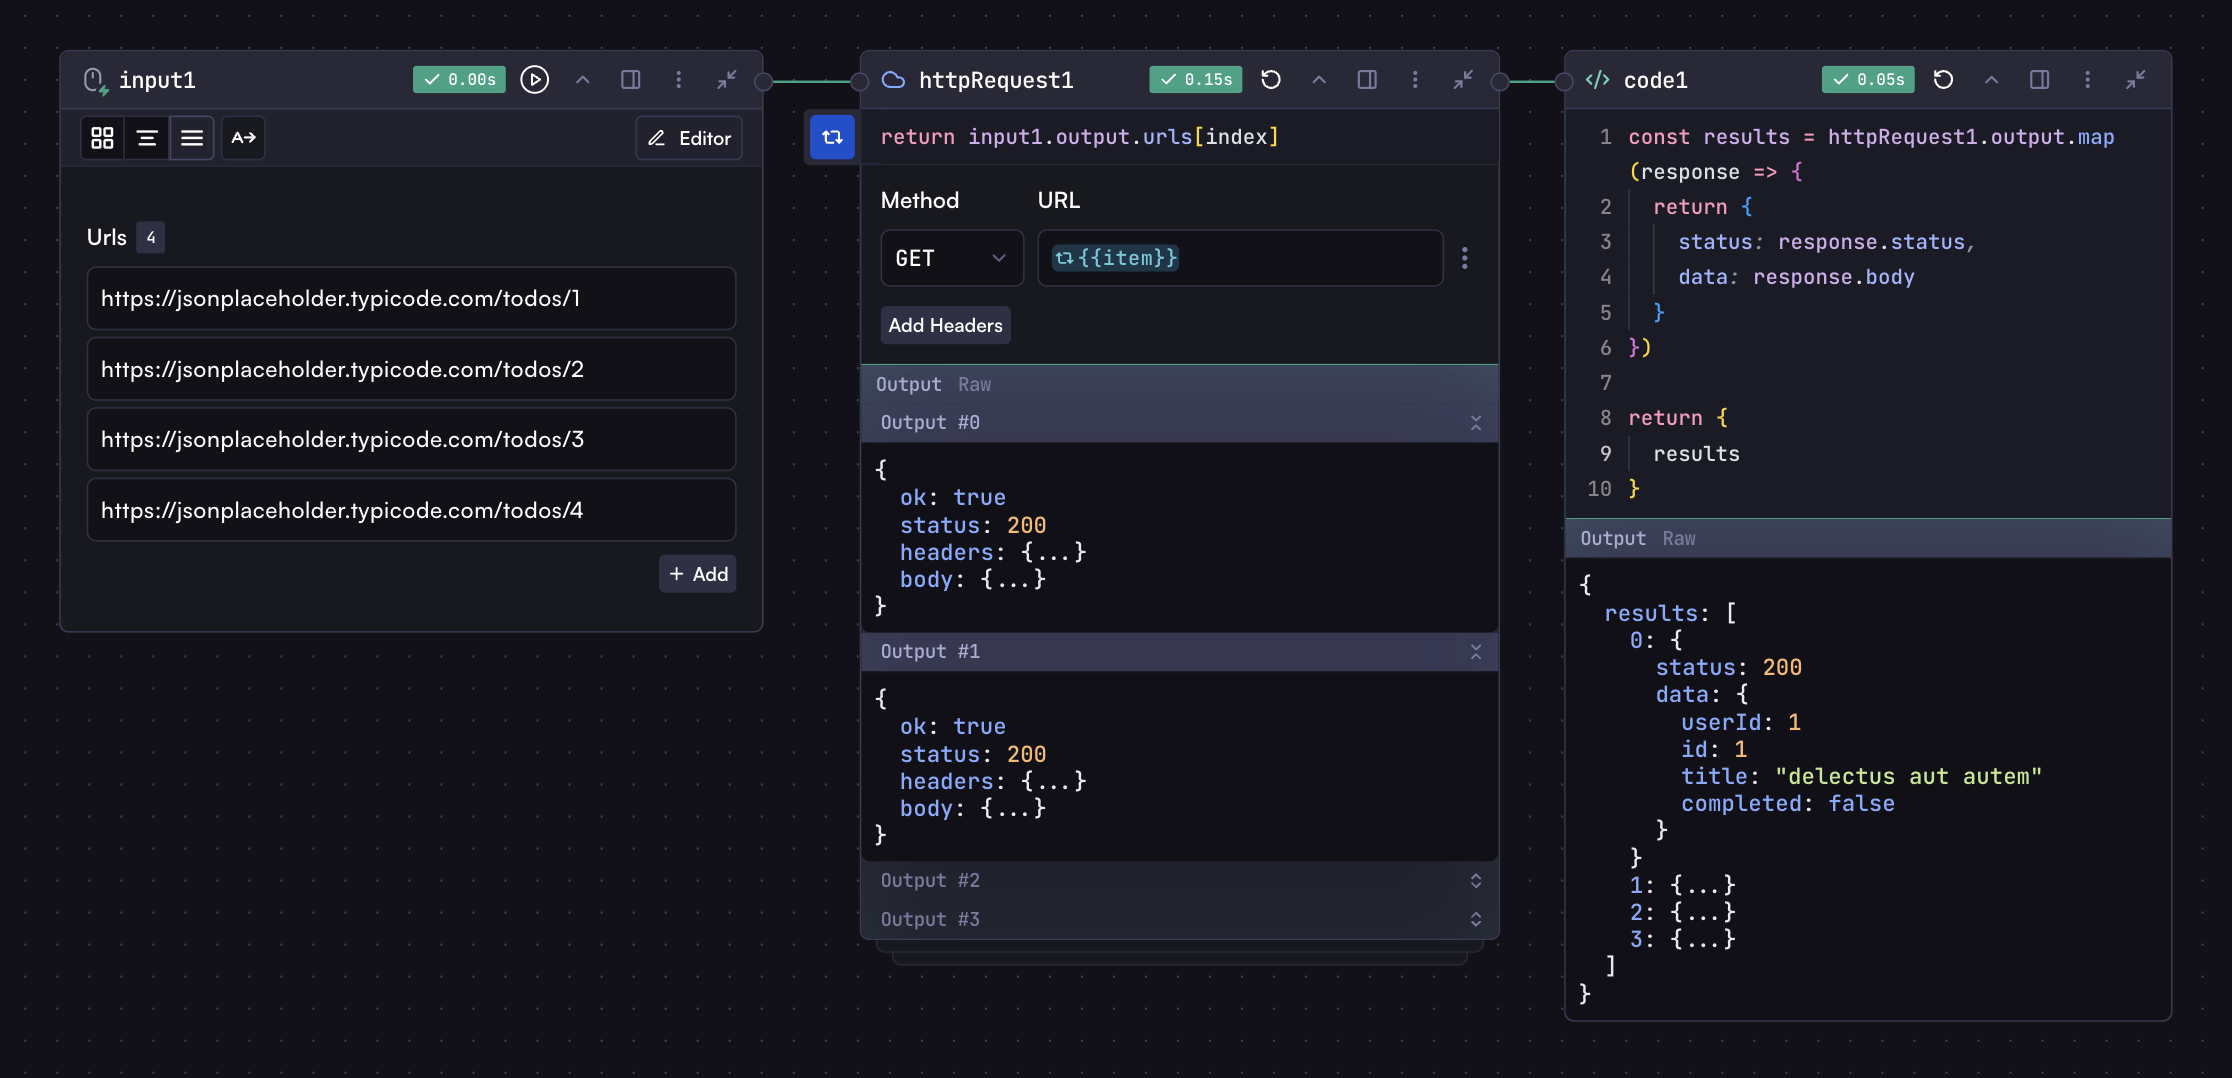
File Batch Processing
Process multiple files with consistent logic: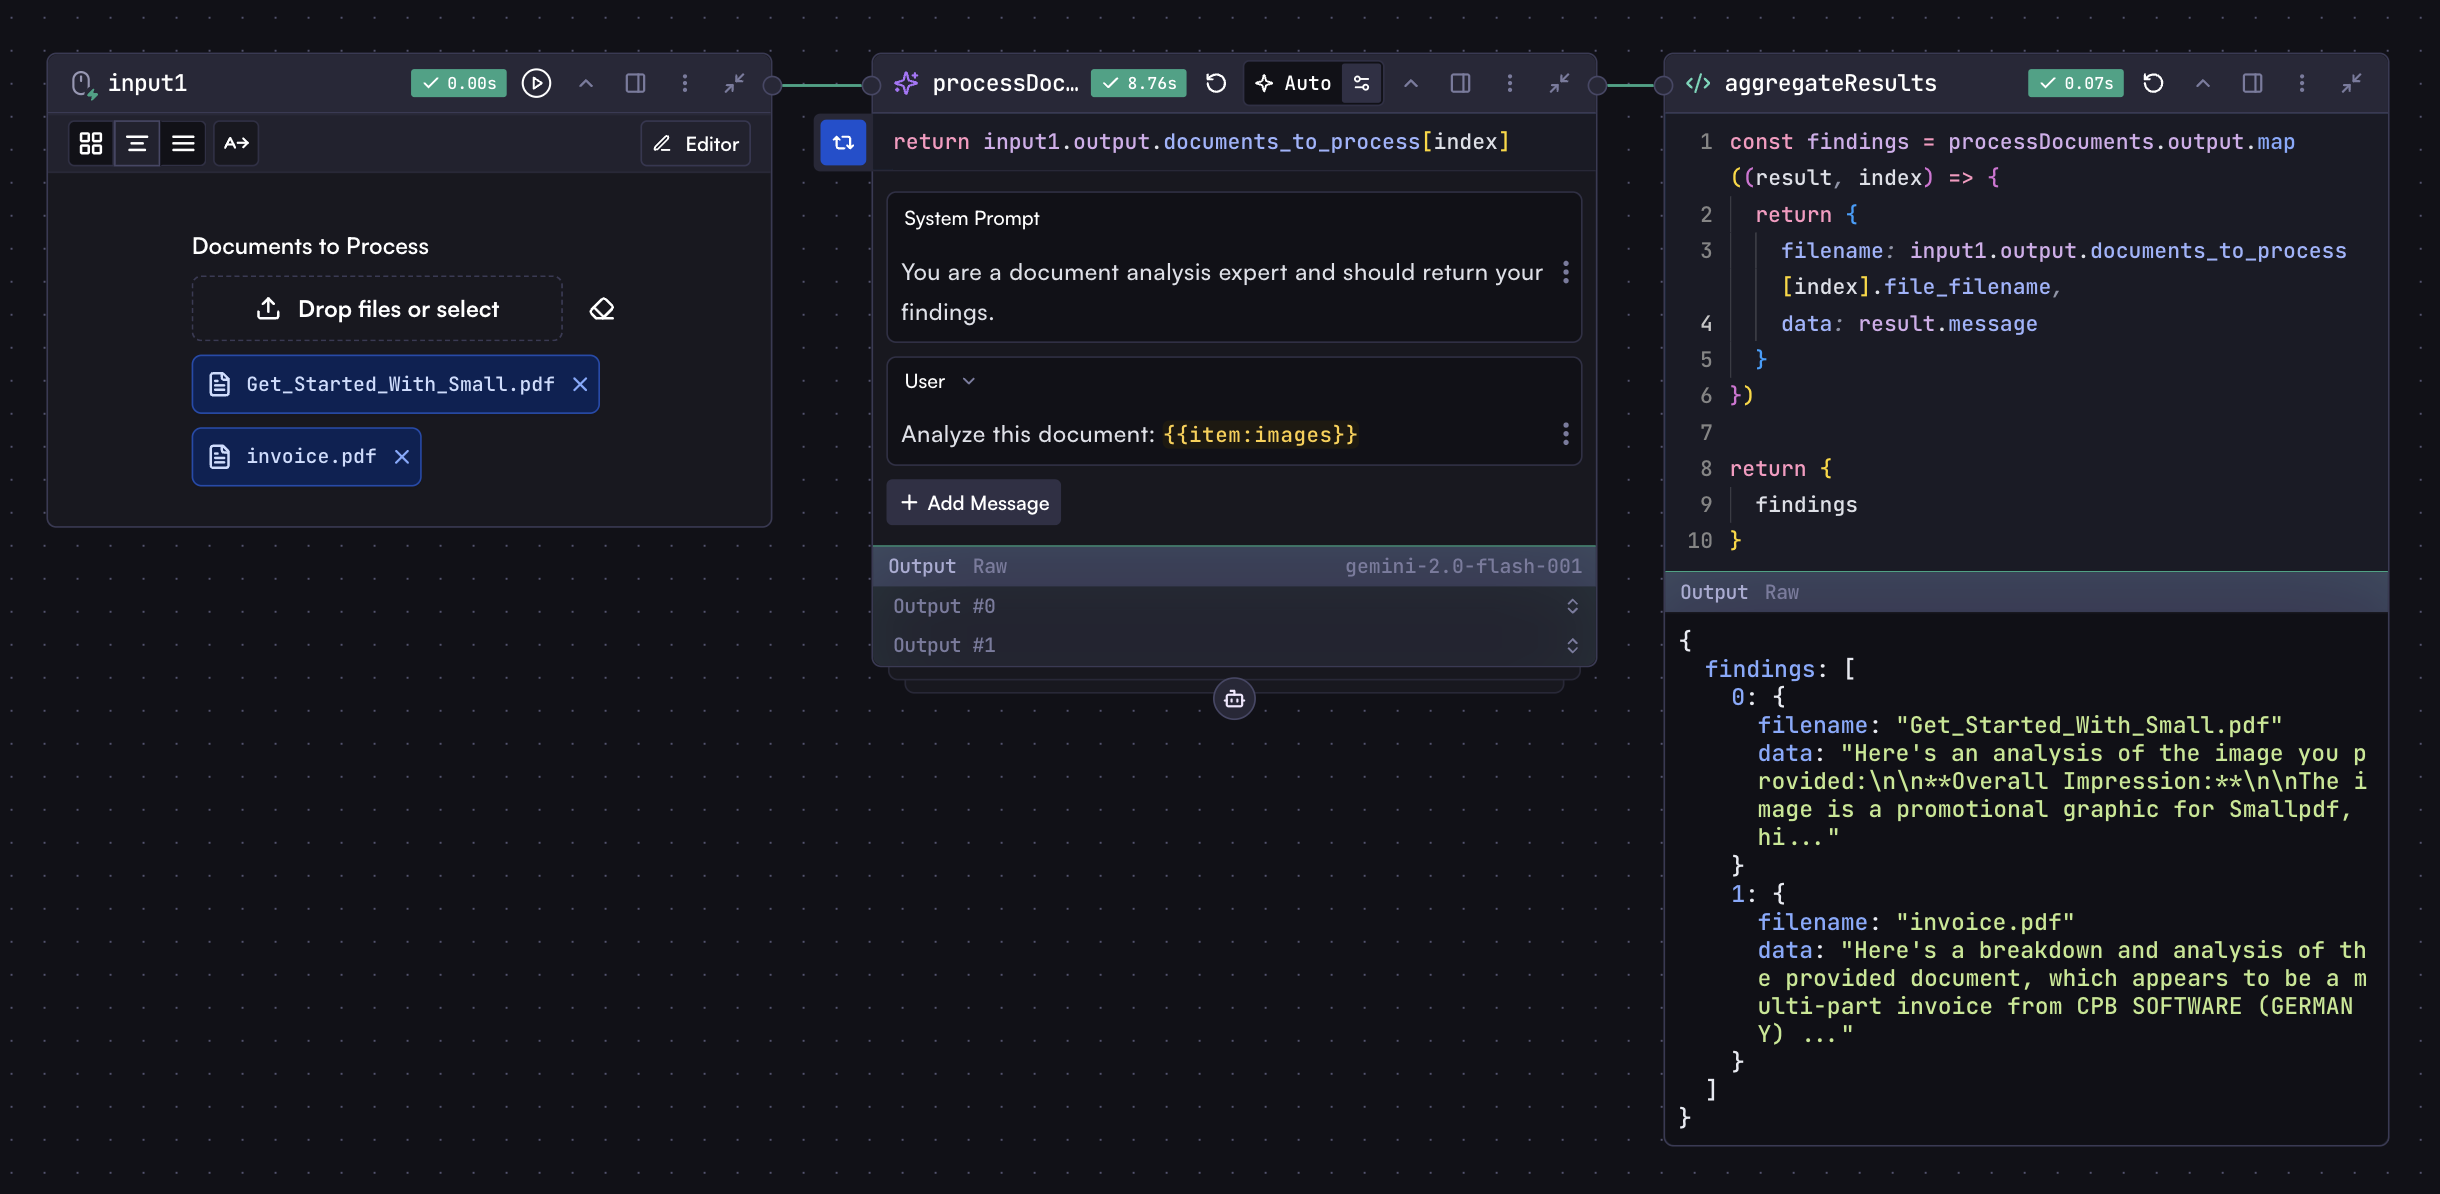
Object Properties Processing
For objects, you can loop through keys or values, so your loop expression should return an object with the key and value:Remove Loop
To remove a loop from a step:- Click the step’s options menu (⋮)
- Click
Remove Loop