> ## Documentation Index
> Fetch the complete documentation index at: https://docs.withcortex.ai/llms.txt
> Use this file to discover all available pages before exploring further.
# Input Webhooks
> Learn how to add webhooks to workflow inputs for quick API access.
Webhooks provide a streamlined way to run workflows via direct HTTP requests. Unlike the standard [API and SDK](/workflows/api-usage) approach, webhooks allow you to call a specific input step directly, making them ideal for quick implementations and simple integrations.
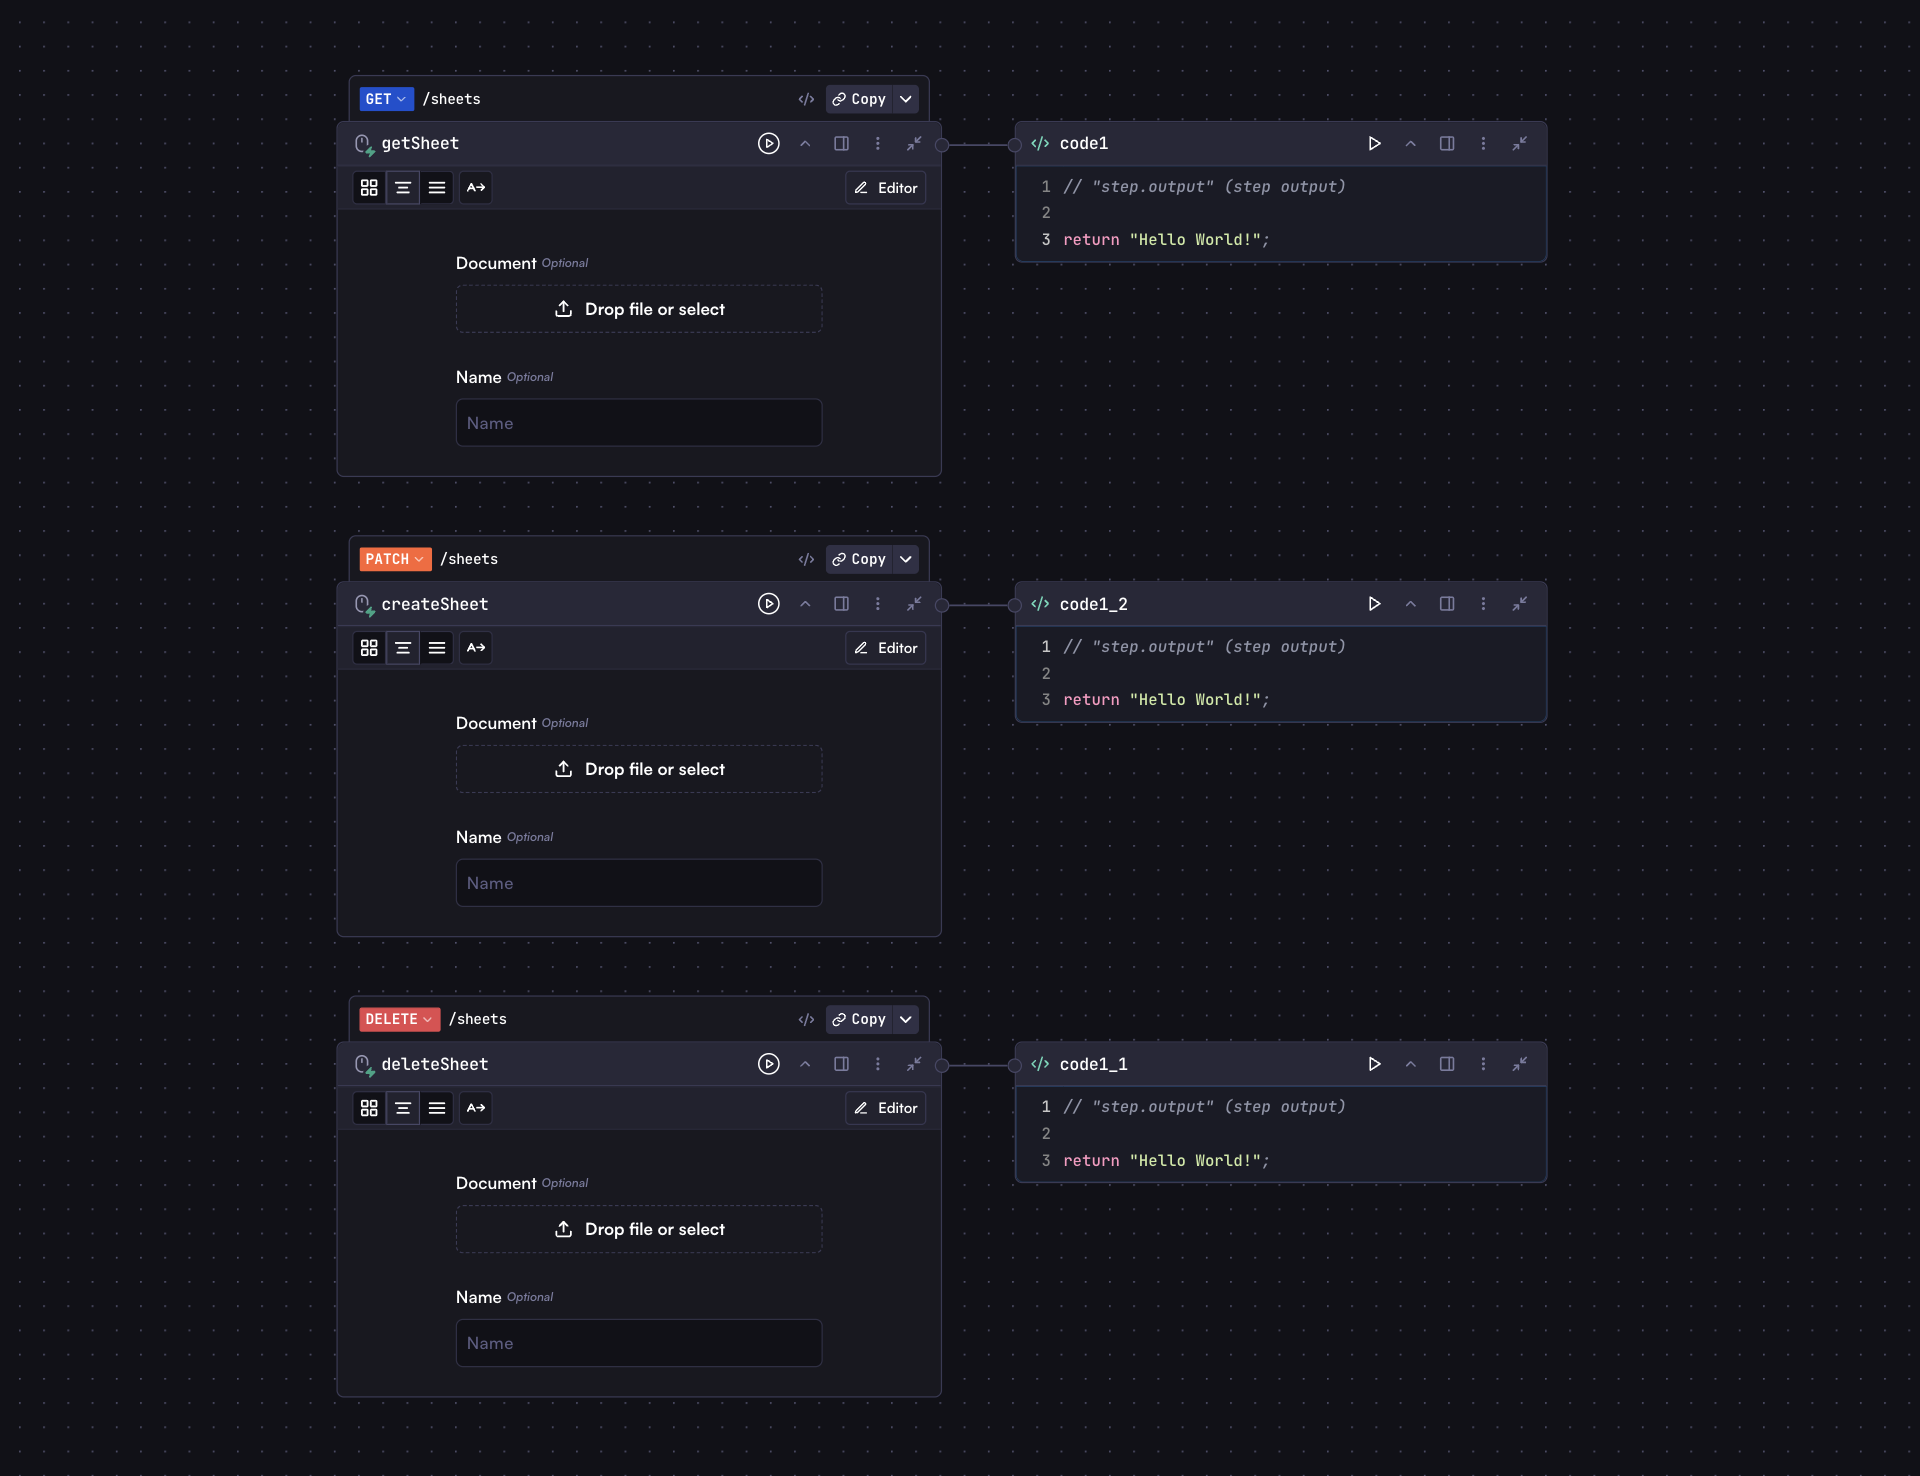 ## Adding a Webhook to an Input Step
To add a webhook to an input step:
1. Select your input step
2. Click the options menu (⋮)
3. Select "Add Webhook"
4. A new header will appear above the step with the HTTP method and path
Once added, you can modify the HTTP method and path by clicking on them in the webhook header.
## Webhook Configuration
By default, the webhook path is set to the input step's key (e.g., `/input1`). You can customize this path to better represent your workflow's purpose.
If there are multiple webhooks with the same method and path, only one will be
executed based on their order in the outliner.
## Webhook URLs
After adding a webhook to an input step, you can access the webhook URL in two ways:
1. **Copy Latest Version URL**: References the latest deployed version of your workflow
2. **Copy Draft Version URL**: References the current draft version (for testing before deployment)
Access these URLs by clicking the "Copy" dropdown button in the top-right corner of the workflow interface.
## Running a Workflow via Webhook
Webhooks provide a simple way to trigger your workflows through HTTP requests. You can call webhooks with different HTTP methods and pass parameters to your workflow inputs either through query parameters or in the request body.
### Using Query Parameters
For GET requests, parameters must be passed as query parameters:
```
https://api.withcortex.ai/webhooks/work_xxx/input1?text=Hello&file=https://example.com/sample.pdf
```
### Using Request Body
For POST, PUT, PATCH, and DELETE methods, you can pass data through the request body as JSON:
```bash theme={"system"}
curl -X POST "https://api.withcortex.ai/webhooks/work_xxx/input1" \
-H "Content-Type: application/json" \
-d '{
"text": "Hello",
"file": "https://example.com/sample.pdf"
}'
```
## Webhook Limitations
Webhooks have some limitations compared to the standard [API and SDK](/workflows/api-usage) approach:
1. **No streaming support**: Cannot stream responses
2. **File handling**: For GET requests, files must be passed as URLs or base64-encoded strings. For POST, PUT, PATCH, and DELETE requests, you can use FormData to upload files directly.
3. **Size limits**: If files are passed as base64-encoded strings, consider URL length limits for GET requests (typically 5MB or less)
4. **No SDK support**: Must use direct HTTP requests
## Webhook Response Structure
The webhook response structure is identical to the [API response](/workflows/api-usage#response-structure):
```json theme={"system"}
{
"id": "run_xxx",
"status": "COMPLETED",
"result": {
// Output of the workflow's last step
}
// Additional metadata
}
```
## Understanding the Input Object
The input object for webhooks follows the same structure as the [API input object](/workflows/api-usage#understanding-the-input-object). The parameters you provide (either via query parameters or request body) correspond to the fields you've defined in your workflow's input step.
For example, if your input step has fields like `names`, `preferredContact`, and `addressInfo`, your webhook POST request body would look like:
```json theme={"system"}
{
"names": ["Alice", "Mark"],
"preferredContact": "phone",
"addressInfo": {
"streetAddress": "123 Maple Street, Springfield, IL 62704, USA"
}
}
```
## Background Processing
Webhook requests have a 100-second timeout limit. If your workflow takes
longer than 100 seconds to complete, the client connection will time out,
though the run will continue executing in the background.
For long-running workflows, you can explicitly execute them in the background:
```bash theme={"system"}
curl -X POST "https://api.withcortex.ai/webhooks/work_xxx/input1?background=true" \
-H "Content-Type: application/json" \
-d '{
"text": "Hello",
"file": "https://example.com/sample.pdf"
}'
```
This will return immediately with a run ID that you can use to check the status later using the standard API.
## Uploading Files with FormData
For non-GET requests (POST, PUT, PATCH, DELETE), you can upload files directly using multipart/form-data:
```bash theme={"system"}
curl --request POST \
--url https://api.withcortex.ai/webhooks/work_xxx/input1 \
--form 'file=@./path/to/file.pdf' \
--form 'text=Hello World'
```
This allows you to easily upload local files without having to convert them to base64 or host them at a URL. You can mix file uploads with regular form fields as shown in the example above.
## Securing Webhook Endpoints
Webhook endpoints have no built-in authentication by default and can be called
by anyone who knows the URL. It's important to implement some form of access
control.
Until built-in authentication is available, you can secure your webhook endpoints using these approaches:
### Implementing Authentication in Code
For more robust security, add a code step immediately after your input step that validates request headers or tokens:
## Adding a Webhook to an Input Step
To add a webhook to an input step:
1. Select your input step
2. Click the options menu (⋮)
3. Select "Add Webhook"
4. A new header will appear above the step with the HTTP method and path
Once added, you can modify the HTTP method and path by clicking on them in the webhook header.
## Webhook Configuration
By default, the webhook path is set to the input step's key (e.g., `/input1`). You can customize this path to better represent your workflow's purpose.
If there are multiple webhooks with the same method and path, only one will be
executed based on their order in the outliner.
## Webhook URLs
After adding a webhook to an input step, you can access the webhook URL in two ways:
1. **Copy Latest Version URL**: References the latest deployed version of your workflow
2. **Copy Draft Version URL**: References the current draft version (for testing before deployment)
Access these URLs by clicking the "Copy" dropdown button in the top-right corner of the workflow interface.
## Running a Workflow via Webhook
Webhooks provide a simple way to trigger your workflows through HTTP requests. You can call webhooks with different HTTP methods and pass parameters to your workflow inputs either through query parameters or in the request body.
### Using Query Parameters
For GET requests, parameters must be passed as query parameters:
```
https://api.withcortex.ai/webhooks/work_xxx/input1?text=Hello&file=https://example.com/sample.pdf
```
### Using Request Body
For POST, PUT, PATCH, and DELETE methods, you can pass data through the request body as JSON:
```bash theme={"system"}
curl -X POST "https://api.withcortex.ai/webhooks/work_xxx/input1" \
-H "Content-Type: application/json" \
-d '{
"text": "Hello",
"file": "https://example.com/sample.pdf"
}'
```
## Webhook Limitations
Webhooks have some limitations compared to the standard [API and SDK](/workflows/api-usage) approach:
1. **No streaming support**: Cannot stream responses
2. **File handling**: For GET requests, files must be passed as URLs or base64-encoded strings. For POST, PUT, PATCH, and DELETE requests, you can use FormData to upload files directly.
3. **Size limits**: If files are passed as base64-encoded strings, consider URL length limits for GET requests (typically 5MB or less)
4. **No SDK support**: Must use direct HTTP requests
## Webhook Response Structure
The webhook response structure is identical to the [API response](/workflows/api-usage#response-structure):
```json theme={"system"}
{
"id": "run_xxx",
"status": "COMPLETED",
"result": {
// Output of the workflow's last step
}
// Additional metadata
}
```
## Understanding the Input Object
The input object for webhooks follows the same structure as the [API input object](/workflows/api-usage#understanding-the-input-object). The parameters you provide (either via query parameters or request body) correspond to the fields you've defined in your workflow's input step.
For example, if your input step has fields like `names`, `preferredContact`, and `addressInfo`, your webhook POST request body would look like:
```json theme={"system"}
{
"names": ["Alice", "Mark"],
"preferredContact": "phone",
"addressInfo": {
"streetAddress": "123 Maple Street, Springfield, IL 62704, USA"
}
}
```
## Background Processing
Webhook requests have a 100-second timeout limit. If your workflow takes
longer than 100 seconds to complete, the client connection will time out,
though the run will continue executing in the background.
For long-running workflows, you can explicitly execute them in the background:
```bash theme={"system"}
curl -X POST "https://api.withcortex.ai/webhooks/work_xxx/input1?background=true" \
-H "Content-Type: application/json" \
-d '{
"text": "Hello",
"file": "https://example.com/sample.pdf"
}'
```
This will return immediately with a run ID that you can use to check the status later using the standard API.
## Uploading Files with FormData
For non-GET requests (POST, PUT, PATCH, DELETE), you can upload files directly using multipart/form-data:
```bash theme={"system"}
curl --request POST \
--url https://api.withcortex.ai/webhooks/work_xxx/input1 \
--form 'file=@./path/to/file.pdf' \
--form 'text=Hello World'
```
This allows you to easily upload local files without having to convert them to base64 or host them at a URL. You can mix file uploads with regular form fields as shown in the example above.
## Securing Webhook Endpoints
Webhook endpoints have no built-in authentication by default and can be called
by anyone who knows the URL. It's important to implement some form of access
control.
Until built-in authentication is available, you can secure your webhook endpoints using these approaches:
### Implementing Authentication in Code
For more robust security, add a code step immediately after your input step that validates request headers or tokens:
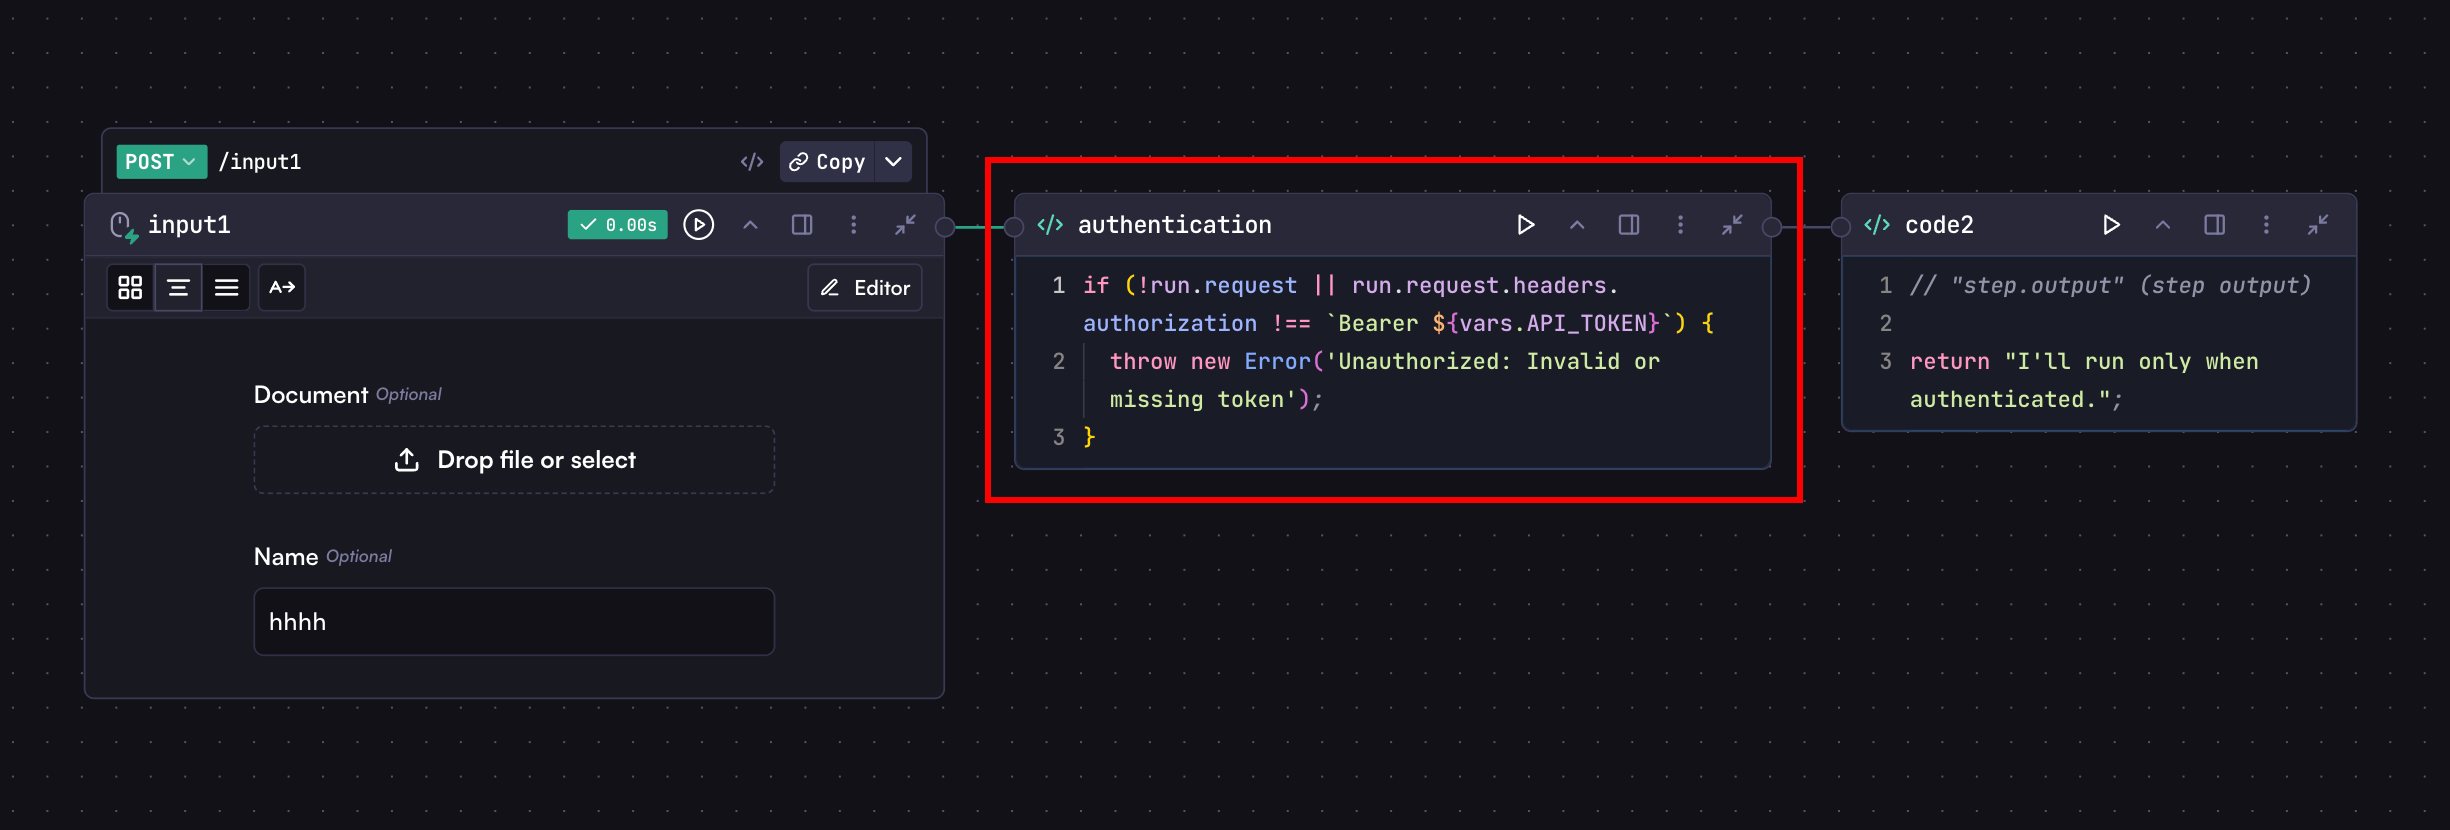 ```javascript theme={"system"}
if (
!run.request ||
run.request.headers.authorization !== `Bearer ${vars.API_TOKEN}`
) {
throw new Error('Unauthorized: Invalid or missing token');
}
```
This example checks for a Bearer token in the Authorization header and compares it with a token stored in [Cortex Variables](/workflows/steps-advanced/variables).
If it's not valid, the code step will throw an error, causing the workflow to fail without running subsequent steps, and the API call will return an error response.
To call this protected webhook:
```bash theme={"system"}
curl -X POST "https://api.withcortex.ai/webhooks/work_xxx/input1" \
-H "Authorization: Bearer your-secret-token" \
-H "Content-Type: application/json" \
-d '{
"text": "Hello"
}'
```
The `run.request` object provides access to:
* Headers (`run.request.headers`)
* IP address (`run.request.ip`)
* HTTP method (`run.request.method`)
* Query parameters (`run.request.query`)
* Request URL (`run.request.url`)
***
Learn about the standard API and SDK approach for more advanced workflow
integrations
{' '}
```javascript theme={"system"}
if (
!run.request ||
run.request.headers.authorization !== `Bearer ${vars.API_TOKEN}`
) {
throw new Error('Unauthorized: Invalid or missing token');
}
```
This example checks for a Bearer token in the Authorization header and compares it with a token stored in [Cortex Variables](/workflows/steps-advanced/variables).
If it's not valid, the code step will throw an error, causing the workflow to fail without running subsequent steps, and the API call will return an error response.
To call this protected webhook:
```bash theme={"system"}
curl -X POST "https://api.withcortex.ai/webhooks/work_xxx/input1" \
-H "Authorization: Bearer your-secret-token" \
-H "Content-Type: application/json" \
-d '{
"text": "Hello"
}'
```
The `run.request` object provides access to:
* Headers (`run.request.headers`)
* IP address (`run.request.ip`)
* HTTP method (`run.request.method`)
* Query parameters (`run.request.query`)
* Request URL (`run.request.url`)
***
Learn about the standard API and SDK approach for more advanced workflow
integrations
{' '}